

Note: This is the latest version (pre-2.0) of Houdini and is currently in HEAVY development. You may want to use v1 instead.
The Houdini Project is free and open source fundraising infrastructure. It includes...
- Crowdfunding campaigns
- Donate widget page and generator
- Fundraising events
- Nonprofit Profiles
- Nonprofit payment history and payouts dashboard
- Nonprofit recurring donation management dashboard
- Nonprofit metrics overview / business intelligence dashboard
- Nonprofit supporter relationship management dashboard (CRM)
- Nonprofit org user account management
- Simple donation management for donors
The frontend is written in a few custom frameworks, the largest of which is called Flimflam. We endeavor to migrate to React as quickly as possible to increase development comfort and speed.
All new backend code and React components should be well tested.
- Ubuntu 18.04, 20.04, 22.04 or equivalent
- Node.js 16 (we require 16 because we want the full internationalization built-in)
- Yarn
- PostgreSQL 12 (10 probably works)
- Ruby 2.7
- Ubuntu 18.04, 20.04, 22.04 or equivalent
Note: All tools will be installed in the Dev Setup.
Houdini's success depends on you!
[https://github.com/houdiniproject/houdini/discussions]
Check our translation guide to translate Houdini to other languages.
Check on contribution_guide_usability_testing.md and create an issue with your test design or run test sessions for opened usability testing issues.
Houdini requires a few pieces of software be installed as mentioned in Prerequisites above, as well as some optional pieces which make development much easier. The optional tools include:
- RBENV - rbenv is a version manager tool for the Ruby programming language on Unix-like systems. It is useful for switching between multiple Ruby versions on the same machine and for ensuring that each project you are working on always runs on the correct Ruby version.
- Automatic Version Switching for Node (AVN) - similar to RVM, AVN makes it simple to switch between versions of Node. When properly configured, it automatically switches version at the console when you change to a directory for a project prepared for AVN, like Houdini.
You'll want to run the next commands as root or via sudo (for Ubuntu 18.04 users
or anyone running ProgresSQL 10, change "postgresql-12" below to "postgresql-10").
You could do this by typing sudo /bin/sh running the commands from there.
apt update
apt install curl -yycurl -sL https://deb.nodesource.com/setup_16.x | bash -
curl -sS https://dl.yarnpkg.com/debian/pubkey.gpg | apt-key add -
echo "deb https://dl.yarnpkg.com/debian/ stable main" | tee /etc/apt/sources.list.d/yarn.list
apt updateapt install git postgresql-12 libpq-dev libjemalloc-dev libvips42 yarn -yyYou'll run the next commands as your normal user.
Note: in the case of a production instance, this might be your web server's user. Note: We use RBENV inside the project folder to have more control over the exact version of Ruby. Tip: To get out of the root shell, run
exit
Run the following command as the postgres user and then enter your houdini_user
password at the prompt.
Note: For development, Houdini expects the password to be 'password'. This would be terrible for production but for development, it's likely not a huge issue.
sudo -u postgres createuser houdini_user -s -d -PNow that we have all of our prerequisites prepared, we need to get the Houdini code.
git clone https://github.com/HoudiniProject/houdiniThis will download the latest Houdini code.
Let's run the Houdini project setup and we'll be ready to go!
git clone https://github.com/rbenv/rbenv.git ~/.rbenvecho 'eval "$(~/.rbenv/bin/rbenv init - bash)"' >> ~/.bashrcNote: close and reopen your terminal.
git clone https://github.com/rbenv/ruby-build.git "$(rbenv root)"/plugins/ruby-buildrbenv install 2.7.8cd houdini
bin/setupNote: The .env file holds your environment variables for development; on production you might have these set somewhere else other than this file. Tip: On Heroku, the environment variables are set in your Dashboard.
Also, you should set the STRIPE_API_KEY and STRIPE_API_PUBLIC environment variables which you'd get from the Stripe dashboard. On your development environment, make sure to use test keys. If you don't, you're going to be charged real money!
Go to Stripe, create an account or just log in with you already have one. Access the stripe dashboard and copy both publishable and secret keys.
make sure to use test keys. If you don't, you're going to be charged real money!
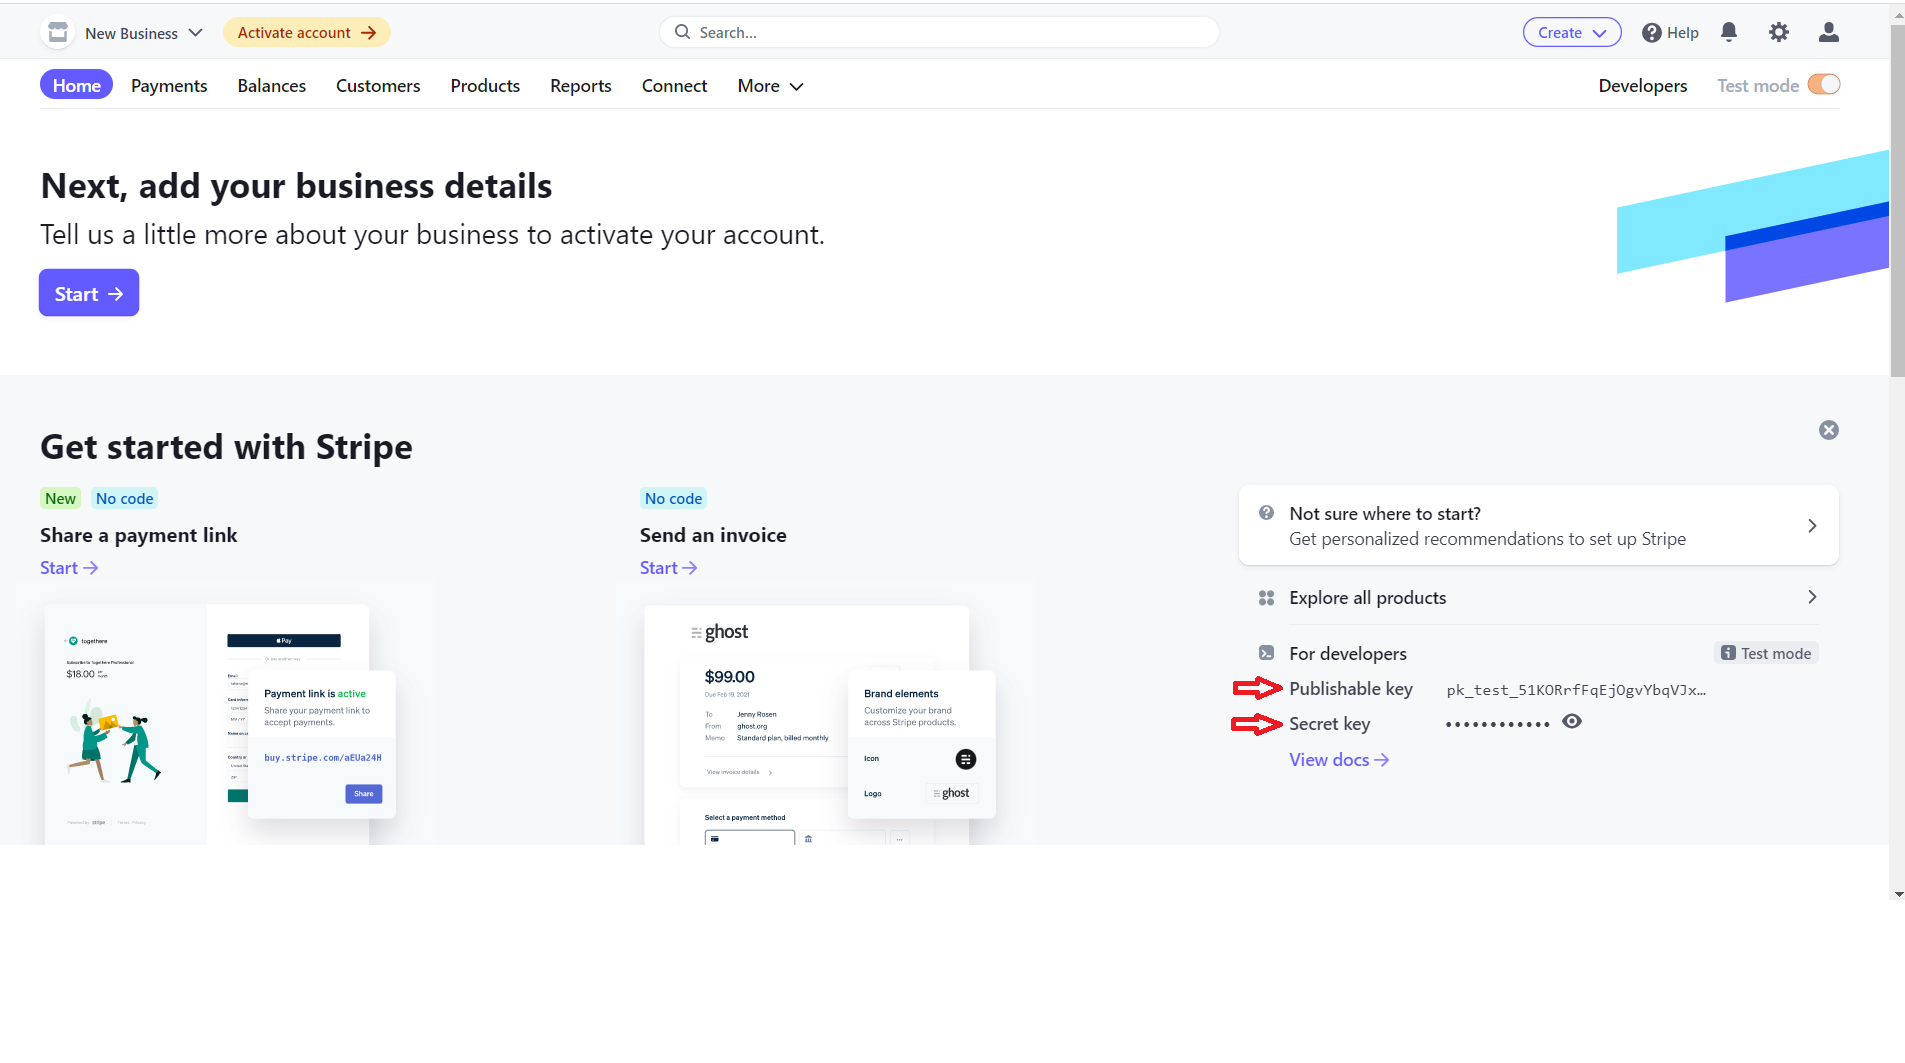
Then after retrieving both keys copy them into your .env file on these lines:
export STRIPE_API_KEY='REPLACE' # use your test private key from your stripe account
export STRIPE_API_PUBLIC='REPLACE' # use your test public key from your stripe accountTo verify everying is set up correctly, you can try running through the Ruby test cases:
bin/rails spec(You can also run bin/rspec, which provides the full feature set of rspec such
as --next-failure and --only-failures, but does not set up a test database
when it doesn't exist.)
You should expect to see the output of the test execution, including messages about pending test cases, and eventually get the output to the effect of below:
Finished in 6 minutes 25 seconds (files took 10.35 seconds to load)
2433 examples, 0 failures, 42 pending

Coverage report generated for RSpec to .../houdini/coverage. 10552 / 12716 LOC
(82.98%) covered.
The important thing to look for is that the number of failures is zero.
We also recommend you run through the javascript test cases by running:
yarn test:jsLastly, you can use Storybook to experiment with the various new React components.
yarn storybookIf you create a new React component, make sure you add a storybook and jest tests for that component!
To create a nonprofit, use the command line to run the following command and fill in the questions with the required information:
bin/rails houdini:nonprofit:createThere are available arguments that add configurations on the nonprofit's creation:
# Make the nonprofit admin a super user (they can access any nonprofit's dashboards)
  -s, [--super-admin], [--no-super-admin]
  # Autoconfirm the admin instead of waiting for them to click the email link
  # Default: true
      [--confirm-admin], [--no-confirm-admin]
Additionally, it is possible to provide arguments to fill in the fields for the nonprofit creation without coming across the questions:
      # Provide the nonprofit's name
      [--nonprofit-name=NONPROFIT_NAME]
      # Provide the nonprofit' state code
      [--state-code=STATE_CODE]
      # Provide the nonprofit's city
      [--city=CITY]
      # [OPTIONAL] Provide the nonprofit public website
      [--nonprofit-website=NONPROFIT_WEBSITE]
      # [OPTIONAL] Provide the nonprofit public email
      [--nonprofit-email=NONPROFIT_EMAIL]
      # [OPTIONAL] Provide the nonprofit's 's phone
      [--nonprofit-phone=NONPROFIT_PHONE]
      # Provide the nonprofit's admin's name
      [--user-name=USER_NAME]
      # Provide the nonprofit's admin's email address(It'll be used for logging in)
      [--user-email=USER_EMAIL]
      # Provide the nonprofit's admin's password
      [--user-password=USER_PASSWORD]
You can use this in the future for creating additional nonprofits.
bin/rails server
You can connect to your server at [http://localhost:5000]
There is a way to set your user as a super_admin. This role lets you access any
of the nonprofits
on your Houdini instance. Additionally, it gives you access to the super admin
control panel to search all supporters and
nonprofits, which is located at /admin url.
To create the super user, go to the rails console by calling:
bin/rails console
In the console, run the following:
admin=User.find(1) #or the id of the user you want to add the role
role=Role.create(user:admin,name: "super_admin")We use Rubocop to perform static code analysis:
rubocopWe have some additional documentation describing some implementations, definitions and other guides on the docs folder.
For a list of how to solve known issues
You will likely want to make a few changes in your configuration of Houdini before running in production as you would for any Rails project. For details, see production deployment.